How to Build a Survival Firebed
By Ron Hood
Burned Buns! – Building the Firebed – Tooferate – Fine Tuning – The "Butt" Hole
This article, by Ron Hood, is available in the Backwoodsman Magazine. When you buy the magazine you will also get Karen Hood’s exceptionally clear illustrations of this life saving technique.
If you have an interest in wilderness skills and general knowledge, I strongly recommend that you subscribe. Charlie Richie and his wife Lynne are good folks and have been publishing this magazine for well over a decade. It is the "insiders" source for priceless wilderness information. To subscribe or have an issue mailed to you, call (719) 783-9028. Be sure to tell them that Ron Hood sent you.
Ron
I Burned my Buns!
By Ron Hood © 1996
Ron and Karen Hood are the owners of Hoods Woods Outdoor Education Center. Ron has been running wilderness programs for over 20 years and to date has taken more than 6,000 people into the wilderness. The company specializes in private wilderness programs and wilderness instructional videos. They have been featured on PBS in a Backpacker Magazine special "Any Place Wild" where he tortures host and "Backpacker’s" Executive editor John Viehman on a survival trip.
"I burned my Buns!"
"Huh?" I mumbled intelligently as I tried to clear my sleep clouded mind.
"Yeah…" he said, "look here. I’ve got plastic melted on my pants and I burned my butt."
"You didn’t use enough dirt," I said, as I noticed that it was darned cold out there. "Out there" was the air two feet from the rock overhang I was calling home.
I looked at my survival student with the most severe look I could muster under the conditions (wrapped in canvas and covered with a foot thick layer of pine needles) and asked him if he had followed the Tooferate rule. "Uhhh, I forgot it," he said. I groaned and said, "Learn it". He left, but I knew that he would learn the rule from a well rested student before the next night began. The rule is important when you want to use a fire bed.
What’s the Tooferate rule? What’s a firebed? Well…
The fire bed is a basic survival technique used by many cultures during periods of cold weather when adequate insulation isn’t readily available. It remains one of the best ways to stay warm in the coldest weather. It is essentially nothing more than an area of ground that has been heated by a fire and then used as a bed. How you heat that area is the topic of this little bundle of words.
Building the Firebed
Probably the easiest way to make a fire bed is to build a long fire on a flat piece of ground, burn it as a cooking/ heating fire for a couple of hours and then just kick the coals into a nearby hole . While the coals are getting used to their new home, you take dirt from the surrounding area and cover the old fire site with about four inches of dirt. When the area is covered (and hopefully flat), you lay down a piece of canvas or a mat and plop down for a snooze on the soon-to-be-warm dirt pile.
While this method is expedient it has a certain lack of class. It is also difficult to control the intensity and duration of the heat being released into the pile of dirt you call a bed. Since you are laying on a pile of dirt, gravity and your inevitable night movements will tend to metamorphose your butt into a digging engine which will soon find itself adjacent to some very warm ground. Time to get up!
I prefer the following technique and have used it hundreds of times during field trips with my survival students.
Find a suitable site, one free of overhanging fuel, nearby flammable clutter, wet ground and major root systems. Dig a hole. Build a fire in the hole. Burn the fire for a certain amount of time. Cover the fire pit with the right amount of dirt. Cover the dirt with debris like pine needles, leaves etc. Cover the debris with canvas, plastic (tarp, trashbags etc.), leather or just your tired body and snooze. Turn over whenever the top gets too cold or the bottom gets too warm. Now the details.
The Tooferate rule
Actually the Tooferate rule is just numbers, Two – Four – Eight. They stand for the following essential bits of information.
The fire burns for TWO hours.
You put FOUR inches of dirt on top of the fire at the end of the burn period.
The original hole was EIGHT inches deep.
That’s it folks.
"Whoa there Fella! How LONG is that hole? How WIDE is that hole?"
It doesn’t really matter. You can treat the hole digging like wood chopping, it warms you when you dig it, it warms you when you burn in it and it warms you when you sleep on it. I don’t like to get too warm digging, or gathering wood, it’s a waste of precious physical energy. The bigger the hole, the more wood and energy you need to use. My beds tend to come out at about one foot wide, six feet long and eight inches deep. The fire will heat the earth out from the edge of the pit to a distance of about 18 inches from either side. That should accommodate even the most profound body or restless sleeper.
Once the hole is dug, line the inside with fist sized rocks. These stones aren’t there so much for holding heat as they are for allowing air to get to the fire for a hotter burn. Don’t tile the bottom. Place them about one inch apart. The tops of all of the rocks should be at about the same height inside the hole. CAUTION, DO NOT USE STREAM STONES! Avoid any rock that may explode when heated. Stones taken from a stream bed may be soaked with water. When the water heats up and becomes steam you could be laying on blasting stones. These can cause injury or scatter your fire to nearby flammable material. Rocks taken from the surface of the ground are probably OK even if the outside is wet.
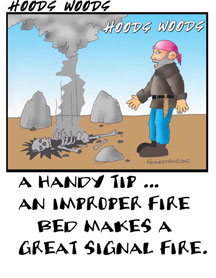
Once the hole has been lined with stones, start your fire. Burn the fire hot and spread the coals out evenly across the bottom of the pit. It is important that the coals be spread as the fire burns or you will have HOT spots! The fire should burn long not high. You aren’t trying to signal Mars so the flames should only be a foot or so high. Burn with flames for about an hour an a half then let the fire die down. Keep smashing the coals with a walking stick or fire prod to make certain that the pit is covered evenly. If the fire burns for more than two hours, no problem. There’s no advantage but no problem either. After two hours or so has passed, cover the coals with dirt. You DO NOT need to remove the coals. Once the pit is covered there is almost no visible sign that you had a firebed.
If it’s nighttime, I often build a small fire pit off to one side, a safe distance away, and start a fire to illuminate the area for the completion of the construction process.
Once the dirt is in place, stamp the ground down. This compresses the earth and helps you to find spots where there isn’t enough dirt covering the coals. A little hint. To dimension your firebed, measure your hand span, tip of thumb to tip of little finger that is about the depth of the hole you dig. To check the depth of the dirt, measure the length of your index finger. I push my index finger into the dirt over the coals. If I start to get burned, the dirt is too thin and I add more dirt. After compressing the dirt and checking the depth, check the area for loose coals that may ignite the material you will be using as a cushion.
Now you wait. If heat comes out of the ground after 30 minutes… you need more dirt. If the heat starts out after about 1 hour… You’ll be just about right. After the bed is ready, you can cover it with your cushion material. I prefer dead pine needles because they smell great as they soak up the moisture being kicked loose from the soil. Sometimes, if I’ve been out for a few weeks, I add sage leaves to the padding. This helps to cover the sublime odor my body exudes after long term survival living. Remember too, the ground may give up a lot of moisture. If the ground is wet you should cover the bed with a water proof material or let the moisture bake out. If you don’t you may have a bad case of "Dish Pan Body".
The bed will release it’s heat slowly over many hours. If you plan to camp in the same spot the next night you can just dig up the pit, refire the coals for an hour or so, cover up and snooze again. Without refiring, the bed MAY last two nights but don’t count on a comfortable second night.
Just a thought. Sometimes I’ll wrap meat (marmot, quail etc.) in leaves and canvas and bury it in the dirt at the foot of the bed. When I get up I have a hot cooked meal ready to go. If you try this trick remember to put the food at the FOOT of your bed, The odor may attract some toothy critter and it’s much better to have it rooting around your feet than your head!
Fine Tuning the Bed
When you build your fire bed, try to build it in an area away from rocks that you may scar with the flames and smoke. Naturally you want to do as little damage as possible with your experimentation. If you need to build the bed for a real survival situation, things change.
In a survival situation, build the bed under an overhanging rock, the rock above your head will absorb heat as well as the ground below. This will result in your sleeping between two heat sources. It’s a little like a low grade oven. I’ve used firebeds in minus 10F degree temperatures with only a piece of canvas as a cover. The sleeping area hovers around 75 feet!
A few pointers with regard to the firebed and overhead rocks. Check the overhead rock to be certain that it is not just a projection of stone, like a finger, that might break off onto you. The heat from the firebed can cause the rock to fracture and fall, a crushing end for an otherwise good survival story! Likewise, don’t set your firebed under sedimentary rock like Sandstone with inclusions, like rocks. These may pop free and whack your skull! Large leaning boulders, overhangs and boulder piles usually offer the best choices.
Once the bed is constructed and the dirt compressed, you can add a barrier to the edges of the bed to keep your insulation from wandering away from you. I like to roll a log up to each side of the bed. Large stones will work as well. The barriers should make the sleeping area look a little like a stone or log "coffin". Fill the "coffin" with pine needles or leaves to make your bed. Wriggle down into the insulation and cover up with a piece of canvas or plastic… Snooze time!
If you are in a hurry or don’t have any insulation available, winter desert survival comes to mind, just use your canvas or plastic and sleep on the ground. Before you do… lay on the bed the way you plan to sleep. Mark where the small of your back encounters the ground. Spread your hand wide and draw two parallel lines with your thumb and little finger, across the width of the bed where the small of your back will be. The lines will be roughly the same width as the small of your back. Dig small depressions (about ½ inch deep) above and below these lines for your butt and back. When you lay down those cups will hold you centered on the bed and the raised area in the center will offer support for the small of your back. They make sleeping on the ground tolerable if not comfortable.
The "Butt" Hole
Another technique for using warmed earth is sometimes called the butt hole because it requires that you dig a hole about the size of your butt. Construction of the butt hole follows this order.
- Find a sheltered spot close to a tree or a large rock. The center of a "V" where large rocks come together is ideal. Trees are less ideal because they generally offer less protection from wind and may suffer damage as the result of your endeavor to stay warm.
- Sit with your back against the rock , knees up almost to your chest. Mark the ground directly below your knees and between your legs.
- Dig a hole the diameter of your butt and follow the Tooferate rule. At this point the hole is basically just a campfire. After the fire has burned down and been covered with earth, put down a layer of pine needles, some bark or small branches as a cushion/insulator seat. You can also use your pack, rope, or other gear for this purpose.
- Sit against the rock, knees up, on the cushion. Drape your back, body and feet with a poncho, a hide, some canvas or a blanket to make a small tent that will channel the heat from the heated earth between your legs into your little shelter.
While this technique is not as comfortable as the firebed, it will keep you warm in low temperatures and can be used in hunting stands.
Good luck!
If you want to learn more about firebeds and a lot more about shelter construction, site selection and survival priorities in general, get a copy of the Hoods Woods Woodsmaster Volume 2 – Principles of Outdoor Survival Shelters video. The video instructions cover the firebed and lots of other interesting and useful skills including time telling with your fist, distance estimation with your thumb, height with a stick, trash for survival and other interesting skills. This high quality 80 minute DVD only costs $19.95 (see our videos selection)!